Saturday, January 28, 2012

Test of Bridgeless Igniters

I wanted the most reliable, low amperage igniters for my deployment system. My system employs a 9V battery through a NE555 timer that delays for 12.5 seconds.

I wanted to see if my dipped bridgeless igniters were capable of consistent and reliable results.

the dipped igniters are not the sensitive type that other pyros make. These were dipped into a mixture of graphite, kno3, and sulfur + lacquer and acetone for the liquid component.

According to this test, the only thing consistent was their inconsistency!

I noticed that they smoked for 1-3 seconds before they send a flame out and ignite the pyrogen. That is not good enough for me, maybe for launch but not for deployment.

I'd rather use the 40 gauge nichrome that gives me instant ignition every single time.

Friday, January 27, 2012

Making Nosecone [ From Body Filler ]

Video below shows another nosecone I made from plastering car body filler over a wooden plug. A condom (yes, condom)  was placed over the wooden plug so that it would not stick to it and could be released quite easily. I used two application of body filler to get it where it is in this video. I sanded out the pits and bumps between each layer.


I will try and do a video that shows how to make a nosecone like this.

Here is the finished product next to an incomplete one:


Tuesday, January 24, 2012

Nichrome wire - With ejection timer Test

I just received 250ft of 40guage nichrome wire. Cost was 11 bucks from Jacobs Online.
The second photo shows how thin the wire is, look for a hair like object to in front of the coil.
This will be used in my deployment system.


First Tests:

My first 6 or so tests failed. The nichrome did not ignite the kno3/sucrose at all! In fact, it actually ignited it whenever it wasn't confined in the ignitor. I cannot explain why that was so. I tried it with BP and the result was similar. I could smell the sulphur but no ignition. I then went and get a newer 9V battery to do the test. I recorded the result below:


Sunday, January 15, 2012

Ejection Timer Test


Based on the design that was displayed in a previous post, this is the result.
I'm thinking 14 seconds is too long. Going to try and get a potentiometer to adjust timing.

EDIT:
I've since modified it to 12.5 seconds. Perfect!

Thursday, January 12, 2012

Ejection Timer Circuit

Below is the design for my prototype ejection timer. It uses an NE555 timer for the delay and an N channel MOSFET to do the switching. Powering this circuit is a 9v alkaline battery. The master switch is switched on right before launch. At that point the circuit is powered but the parachute delay is not yet triggered. The break-wire  will serve that purpose. It is this break-wire that will be broken during launch. This can be done by hooking something grounded to the launchpad and the exposed vreak-wire on the fuselage. As soon as the rocket leaves the pad the wire breaks and the countdown begins.

12 seconds deployment timer


Sunday, January 8, 2012

Using SRM, Free ENG Editor and OpenRocket

I created a page that shows how to design rockets from scratch Using SRM, Free ENG Editor and OpenRocket.

Constructing PVC Ejection Piston

Today I set out to create my PVC ejection piston. I've seen some online that required some sanding of couplings to get it to fit inside the cylinder and they also used an o-ring. They were also single use pistons.
I created this video below to document what I did today.

Material list:
- 8 inch length of 1" inch sch 40 pvc pipe.
- 8 inch
- Hot glue or clear silicone.
- 2 x1" inch PVC caps

  1. Cut a PVC of 1" sch 40 PV, 8 inches long. This will be the cylinder for the piston.
  2. I cut small ring (about 1/4 inch) from the piece that would become the cylinder.
  3. Sand and roughen up the ends of the 1/2 inch PVC.
  4. Use some WD-40 or cooking oil to lubricate the ring.
  5. Squeeze some hot glue or clear silicone inside the ring, just enough to fill the ring and very slightly overflow. This I expect will become the piston head.
  6. Insert piston arm into the glue. Use whatever means to make it stand 90 degrees upright.
  7. Let it dry.
    1. For the hot glue u can place it in the fridge to harden, but not before it sets.
    2. Clear silicone should take 12 hours to cure.
  8. Remove PVC ring. Give it a slight twist to help you.
  9. Bore a 1 inch PVC end cap just big enough to accommodate bridge wire / e-match / ignitor.
  10. Pull out excess wire wire, add some silicone to seal it off. 
  11. Add a spoonful of kno3/sugar.
  12. Cement end cap to cylinder
  13. Add some grease on the piston and insert piston into cylinder.
  14. Add  PVC cement on the cap and on the cylinder.
  15. Insert cap over piston rod and over the cylinder to seal the cylinder.
  16. Add 1/2 inch PVC cap over the free end of the piston rod.
*Clear Silicone can be used to form the piston plunger but it requires overnight curing. It is also weaker than the hot glue.
That's it for now

here is the video

Second edition,

the smoke is mostly from the back where the bridge wire is. It wasn't sealed permanently because I was testing different setup.

Update - Feb 11, 2012
Testing the piston with parachutes.

Saturday, January 7, 2012

Test of 9V Batteries and Bridge Wires.

Batteries vs Bridge Wires

So I finally got around to construct my Ejection Timer for my next project. This device will carry a 9V battery to power the circuit and burn the bridge wire that ignites the ejection charge. I though tit would be appropriate to test my battery with the bridge wire to see how fast it ignites the charge.

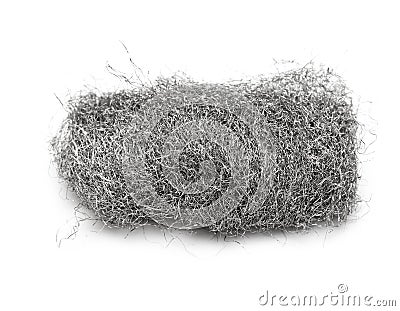
Below is an example of the steel wool I used in this test. I also tested 40awg nichrome wire
Panasonic Carbon-Zinc
To my surprise, the wire barely got heated with the power from these 9V carbon-zinc Panasonic batteries. At first I thought the battery was dead on arrival (or DOA), so I ordered another one of the same brand just to make sure. Unfortunately the result was the same.

My next bet was to try the nichrome bridge wire. I quickly constructed the ignitor and switch on the batteries, this time using both batteries in parallel for more amperage. They failed, terribly. The nichrome didn't even glow


Duracell Alkaline
At that point I start having doubts for this ejection system and considered abandoning the electronics. I made one last attempt and try a different brand and type of battery: Duracell / Alkaline.


I'm happy to announce that this battery burned the thick steel wool in an instant! Hope has been restored to my project and tomorrow I will begin soldering.

One thing I will be sure to do, is to have a test battery different from launch battery. The launch battery will be brand new and unused. I just cant risk launching a high powered rocket that fails the recovery.

Conclusion
Stick with Duracell or Energizer alkaline batteries, or better. My guess is that Carbon Zinc based batteries wont be able to deliver the current we need for ignition. Lithium based batteries probably have more punch, but that was not tested here.